Friday, April 22, 2016

Third Attempt: Metal Skin Fabrication


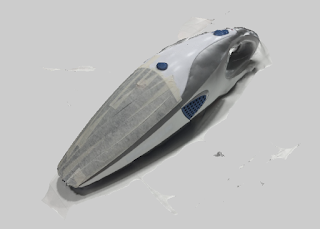
In this attempt I tried to use another method to fabricate the other half of the skin. As my aim is to resemble a very obvious streamline feature of the handheld vacuum, I decided to use the shrinker after watching several youtube channels such as Lazze Metal Shaping. Firstly I drew the streamline on the metal sheet, and I used the shrinker to bend along the line. The result is quite good as the streamline really stands out, however my shrinker skill is not developed yet, so I have leaved some shrink marks on the skin along the streamline, which I need to get improved next time.


I spend around an hour on the shrinker, because I kept adjusting the fold line until the line fits the streamline of my template. An accurate fold line gives me a good foundation to work on. After this, I started working on the body of the skin, which was tough, especially when shaping the handle part of the skin, I spent 4 hours to hammer on the surface of the skin until it finally fits my template. The result is shown below.


Other than the shrink marks, this attempt is actually more precise and accurate than the second attempt. From the images above, you can really tell the skin fits better to the template, thanks to the shrinker, which makes the job easier, quicker and more accurate. However, I am still not satisfied with the result and I hope I can create a perfect fitting skin later in the course.

Thursday, April 21, 2016

Second Attempt: Metal Skin Fabrication

This time I started with an easier strategy, to fabricate half of the skin first, this allows me to have easier control on the sheet metal.

I started by cutting out a semi-slightly deformed ellipse, then I drew the streamline feature on the skin, the pen marks are still on the model. After this, I started to stretch the metal along the line by hammering from inside. When the metal started to curve, I then further fold the metal along the line to create the streamline feature. The process was slow and long, requires a lot of shrinking and stretching, but the result is encouraging, you can see the obvious streamline from the images.

The Skin Fits Well to the Template
Besides of fabricating the streamline feature, making the skin fitting to the template is extremely hard. Every time I try to make the streamline more obvious, the bottom part of the skin starts to straighten, which makes it very hard to fit onto the template. I had to do a lot of shrinking on the top part of the skin, and stretching the bottom of the skin, and this requires extremely careful balance.


First and Second Attempt Comparison
Although the second attempt is much better than the first one, the skin is still not perfect fit to the template. Also, there are a lot of hammer marks and blemishes on the surface of the skin, which makes it less aesthetic. I hope my next attempt, which is the second half of the skin, will be much more accurate and with finer details.

First Attempt: Metal Skin Fabrication

Front
My first attempt was a disaster, the outcome is nothing close to the template but an awkward shape. I underestimated the difficulty of sheet metal fabrication, and I thought I could fabricate the skin in one piece in a day. This is a disgrace to my handheld vacuum.

Back
I started by cutting out an ellipse shape with 363mm diameter, a slightly longer length than the template as it would bend to form the shape later. After cutting out the metal sheet, I drew a centre line and then started to stretch the metal along the line by hammering on it. It was not long until I encounter my first problem...As the centre line started to stretch, the two sides of the sheet started to bend outward. As a result, it took me forever to make the curved shape, in fact it never happened...

Bottom
Another problem is that I was not familiar with the shrinking technique. I wanted to shrink the head of the skin to form the slim head shape of the vacuum, but with limited experience and knowledge, I was stretching the head instead of shrinking it, causing the shape to deform even more, resulting with this awkward shape.
Practice makes perfect, although my first attempt ended up a disaster, I am glad that I have identified the problem behind and I start to have some ideas about metal shaping. Now I know what to do for my second attempt, and hopefully it would be better.

Final Template

Final Template
The final template is 290mm long, 74mm wide and 71mm high. I am very happy with the result as the streamline feature of the vacuum really stands out on this final template.


Compare the streamline feature of the vacuum with the template, the template resembles the line accurately and effectively, which really helps me a lot for my metal sheet fabrication later. Other assemble methods will not have such a great result as this stacked slices template.

The template resembles the vacuum's handle effectively
The template is around half the size of the original vacuum. As my chosen object is a handheld vacuum, it is meant to be portable, being carried around household. If it is meant to be portable, why not making it even more portable? Imagine a mini vacuum that you can put in your backpack/purse, imagine bringing your own mini vacuum to Red Centre and cleaning up your own mess after model making, it will certainly make Red Centre a better place to be in.

Laser Cutting


My final choice of material is 1.6mm plywood. I choose a thinner thickness so the final template can resemble more accurate curves and streamline features of the vacuum. The template is going to be assembled with 44 stacked slices.

Remember to set the right colour for your laser cut file, red line work for cut through parts and blue line work for engraving parts, set the line weight to 0.001mm for the most accurate result.

123D Make

After exporting from Meshmixer, the model is almost really to be laser cut! Just before it you will have to choose the assemble method of your model, each method has its strength and weakness, so carefully consider which method suits your model the best. You can choose from 4 methods (for this course) as listed below.

Radial Slices
This was my initial choice. However, I realized that this method does not resemble the curved shape of the head of the vacuum, so I did not use it.


Interlocked Slices
This one is a better choice than the radial slices as it shows a more accurate curved shape of the head, but it still does not show the streamline feature that goes through the whole body of the vacuum. I did not use this method as the streamline feature of the vacuum is the most interesting part of the design, which I really want to model on the sheet metal skin later.


Curved Slices
This looks like a French Bread...


Stacked Slices
This is my final choice, as it resembles very fine and detailed curves of the vacuum, notice the handle of the vacuum. Most importantly, it is capable to show the streamline feature of the vacuum, which will really help me to model the sheet metal later on.

Wednesday, April 20, 2016

Let's get started: 123D Catch and Meshmixer

123D Catch Initial Capture


I used the 123D Catch app for iPhone to do the capture. Note that I have applied some masking tape on the reflective surface of the vacuum in order to get the best result. Also, I suggest taking at least 40 images to get a more detailed and accurate capture.


Capture in Meshmixer

The capture is then exported to Meshmixer for further refinement, this includes clearing out the background and smoothening up the model. Remember to make solid after you have done all your modification, if not the model will not work in 123D Make, which is the next step.

Found Object・Handheld Vacuum


As an Architecture student, model making is an inevitable part of my life. To me model making could be unforgiving, it is a test of perseverance and endurance. I have a habit of using a handheld vacuum (image above) to freshen up my room after every model making session, thus this gadget marks the end of my every "battle". This vacuum is not a usual one, besides of balsa fragments and dusts, it is capable of cleaning up my exhausted and anxious mind, it sucks away all regrets of the past, prepares me with a freshened mind for the upcoming challenges. Every time I hear the noise of the vacuum, it reminds me of the end of a project, it is a sound of triumph. This vacuum has been with me since my very first model making project, it is my comrade in arms, so I would like to use it as my object to honour it. With its elegant and streamlined design, I am confident of calling it 'the architect's vacuum'.


Porsche Pavilion, Wolfsburg, Germany
Section

With the availability of modern technology, curved and streamlined architecture is made possible, liberating us from the cold and rigid era of the International Style. The handheld vacuum's streamline feature resembles some innovative form of modern architecture. More importantly, it resembles architecture as a temporary shelter for dusts and fragments, this inspires me that humans deserve to be sheltered in beautiful spaces, as even dusts and wastes have such an elegant shelter. As a next generation architect, the vacuum reminds me to think out of the box, be innovative and always consider humans first in any design situation.